How to check if your IP address is blocked by our firewall

Our Hosted Email and Web Hosting services are protected by multiple layers of security systems, one of which is a brute force attack detection mechanism. A brute force attack is when a malicious user keeps trying to access your account over and over again using commonly used passwords or by guessing what your password might be. Blocking this kind of attack is a very effective way of protecting your sites and email accounts from malicious access.

Every now and again it happens that a legitimate user forgets their password or mistypes it a few times and ends up blocking themselves. This can be very frustrating, so to make your life easier we have build a little utility that you can use to check if you’ve been blocked by our firewalls, and you can even use it to unblock yourself immediately.

To check your IP address if it’s blocked on any of our servers just visit https://blocked.anu.net/

Once loaded you should be able to see something like the picture below

NOTE: IP address is auto detected so if you want to check an IP address from a different location, just replace the detected IP address on the search box with the IP address you want to check.

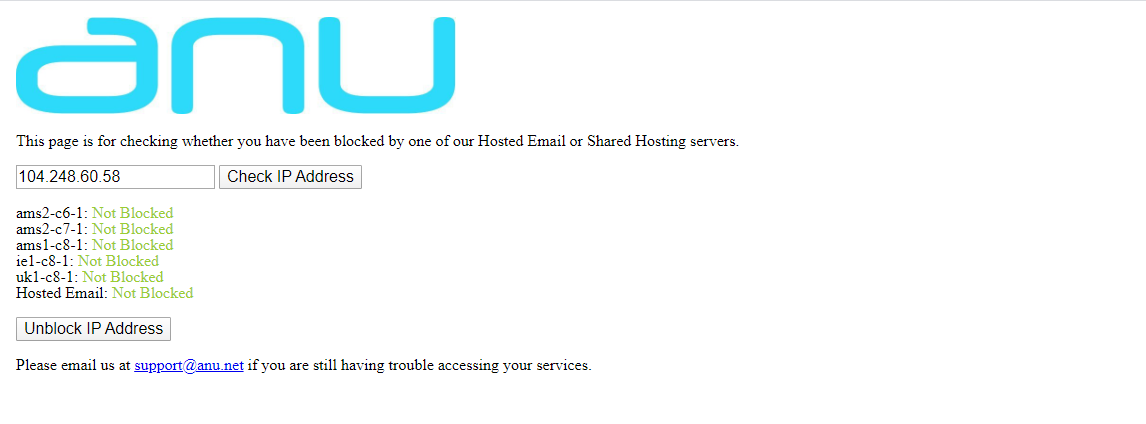
If you are seeing “Not Blocked” next to all the servers then that means you are not blocked by our firewalls. You should be able to access your sites and email accounts.

If you are seeing one of the server is showing as “Blocked” in red letters, then you can just click on “Unblock IP Address” button to unblock yourself.

If you are still having difficulty accessing your website or email address, or if you encounter any difficulties with the self service unblocking tool, please do not hesitate contact us via live chat or by email to support@anu.net.

How to Change your Hosted Email mailbox password

To change your Hosted email password:

  1. In your browser, go to https://portal.anu.net and use your Hosted Email address to login.
  2. Once you are in, Click on Email Settings and once you are on the Email settings page, under Password on the Change password field tick on “Change”, then a new field will appear to let you type your new password.

3. Type in your new password on the Password field and repeat it in the Password (Confirm) field.

4. Navigate to the bottom of the page and hit “Save” button.

5. Your new password has now been set. Make sure to update the settings in any email clients that had the old password saved, including any mobile devices connected to the account. If you have any questions or run into any problems please do not hesitate to reach out to us via Live Chat or email support@anu.net. Tip: if you can’t access your email via your regular email program due to authentication failures, you can always log in to Webmail and email us from there!

How to setup a Vacation mesage for your Anu Hosted Email account

To set up a Vacation auto-reply message on your Anu Hosted email account, also sometimes called Out of Office, follow these steps:

  1. Login to https://portal.anu.net with your Anu Hosted email account.
  2. Click on “Email Settings” to reach the settings of your email account. See screenshot below:

3. Once you are on the email settings of your account, navigate to the vacation settings and tick “Enable” to enable to vacation settings.

4. Once you enabled the vacation settings other options will show just like the screenshot below:

5. Under “When to Start” settings tick on “Specified time” to set the start time of your vacation auto reply message.

6. You will also need to enable the “When to End” settings, where you will need to specify the end date of your vacation settings to stop the vacation mode. See screenshot below

7. Now you also need to put the subject of your vacation auto message and as well the content why you are on a vacation mode. See screenshot below:

8. After you filled the “Subject” and the “Vacation message” navigate to the bottom of the email settings and hit the “Save” button to save the changes you set.